Everything, you need to know, about vinyl t shirt printing, in one place.
Do, you, like us, have become fascinated with vinyl t shirt printing, or you are already quite established in the world of custom printing, and now you want to experiment with garment decoration using vinyl for shirts. Fortunately, you do not need to spend hours on the internet finding out the scoop about CAD cuttable T-shirt transfers, also called “T shirt vinyl” or “heat press vinyl”. We have got you covered with our scoop on heat transfer films that can be used with a vinyl cutter and vector software to create the best designs.
Stay with us till the end to find out everything you need to know before you step into the field of vinyl transfers and start printing t-shirts.
T-Shirt Vinyl Hardware
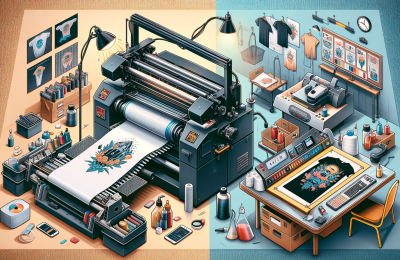
The hardware you need for vinyl for shirts is the same as the one that is used for making vinyl signs. The things you need to carry out the vinyl transfers for printing shirts include equipment, such as a personal computer, vector software, a cutting plotter or vinyl cutter and heat press.
If you want to start off with a small project, then you can easily make do with a small inexpensive press, but if you want to hit the market, like the big retailers, then you will need something robust.
T-Shirt Vinyl Software
Again, for the software, you can use the same one that is used for signs. So, just go for the same vector-based software but reverse the image before you cut it. Creating and applying the letters on apparel is almost the same for iron-on vinyl for shirts, as it is for vinyl graphics. However, before you send a design job to a vinyl cutter from your vector software, you must reverse it to get a mirror image of your original design.
It is just like an upside-down vinyl, so when you load your media onto the plotter, the liner faces upward. And when you plot the film, you cut the bottom not the top of the face film, so you have to flip it before sending it to the plotter. Plus, most of the t shirt transfers designs films have a single liner and only a few have an additional one to protect the film. Hence, you need to cut a section of the extra liner before you plot or cut the job.
Weeding and Pressing
Once you’ve cut the graphic, weed it, and you will see the clear liner showing your graphics on the bottom. Now put the weeded graphic on your garment in the right reading, but remember if you are still looking at the mirror version of it, it will actually stick to the press rather than the shirt.
After that, cover your film with silicone Kraft paper or a Teflon sheet to ensure even distribution of heat, and set the time, pressure, temperature, and close it. After you are done pressing, wait for the tie to finish and remove the liner.
Each thermal transfer film comes with its own time, pressure, and temperature settings which you can find online. It is important to remember these specifications when you are dealing with a heat transfer t shirt.
Types of Heat Press Vinyl Supplies
You will find different types of t-shirt transfer materials in the market. Let’s take a look at them:
PU vs. PVC
Polyurethane films are the perfect medium for carrying out t-shirt transfer graphics during vinyl t shirt printing. They are more stretchable and thinner and feel like they are a part of the garment, and feel so soft, which is what makes them perfect for apparel graphics. Plus, Polyurethane films are OekoTex Standard 100 and CPSIA compliant. Most importantly, they are safe for kids.
PVC T-shirt films, on the other hand, are less expensive and thicker, which makes them less flexible and less soft. In addition, they are also not safe for kids who may put it in their mouth. Therefore, PVC films should only be used for adults.
Warm or Cold Peel
The time required for the adhesive to cure before you remove the liner is important for productivity. Traditional heat press films have to be cooled down to room temperature, before you can remove the liner and, this makes the adhesive bond completely to the fabric. This can be frustrating when you are working with multiple colours. Hence, for more complex and intricate designs, it is better to use a warm peel product to save time.
Film and Fabrics
Since the shirts you make have to be worn at some point., it is important to choose the right film for the fabric you intend to use. With some exceptions, standard PVC and PU films are compatible with acrylic fabrics, polyester, polyester blends, cotton, and cotton blends and that is what most casual and sports apparel are made of. However, these films are not compatible with all garments. For special fabrics, such as Lycra Spandex, nylon, and leather you have to use different types of film. You can also use one-film-fits-all solutions which are compatible with a wide range of fabrics, such as Nylon and sublimated polyester.
Bling It Up
Standard spot colour graphics are perfect for the most common applications, such as softball jerseys. But nowadays, the demand for eye-catching apparel has increased which is essentially just heat transfer materials with an extra punch. You can use these materials to add special colours, such as fluorescent or metallic, patterns, holographic effects, or glitter to make custom garments.
Out of all the special heat transfer films that introduce the bling, the ultra-metallic glitter-flake films is the most appealing one at the moment. Bling and glitter are 12mil materials with plenty of metal flake, which makes them a bit difficult to cut and weed compared to a standard vinyl t shirt printing.
Supplemental Supplies
Now that you have your hardware and software sorted for vinyl t shirt printing, let’s discuss the additional supplies you are going to need. You will need a Teflon sheet, a T-Square It or Logo It, some weeding tools, and a safety ruler. You will also need a Geo Knight IR thermometer kit to make sure that your heat press is as hot as you think it is. So, get these supplies before you venture into the vast world of vinyl transfers.
Final Word
That’s it for vinyl transfers and the equipment required to carry it out perfectly. All you have to do is keep the above-mentioned information in mind and start your new journey with vinyl t-shirt printing. Best of luck and happy printing!


![Iron-on Heat Transfer For T-shirts [2023]](https://blog.garmentprinting.com.au/wp-content/uploads/2021/10/Iron-on-Heat-Transfer-For-T-shirts-400x260.jpg)